

CONSCIENTIOUS BRIDLING
- Susan Warnock
- Nov 30, 2020
- 5 min read
Updated: Dec 11, 2021
by Susan Warnock | Feb 5, 2016 | Education

An ounce of prevention is worth a pound of cure. This is truly a wonderful analogy for good horsemanship. Dealing with horses in a conscientious and proactive manner will always produce the kind of horses people love to own and ride. Bridling is an area in horsemanship which can quickly head in a negative direction if not handled appropriately as the horse’s mouth is one of its most sensitive places.
This article will discuss how to properly bridle a young horse or an older horse that doesn’t suffer from a hard to bridle issue so that it never develops one. However, if you’re like many people and have inherited a bad to bridle horse (from someone who lacked the knowledge to prepare the horse to accept bridling and make it a positive experience) please see Help For The Head Shy Horse and The Difficult To Bridle Horse.
CONSIDER THE HEAD GEAR YOU WILL RIDE YOUR HORSE IN...
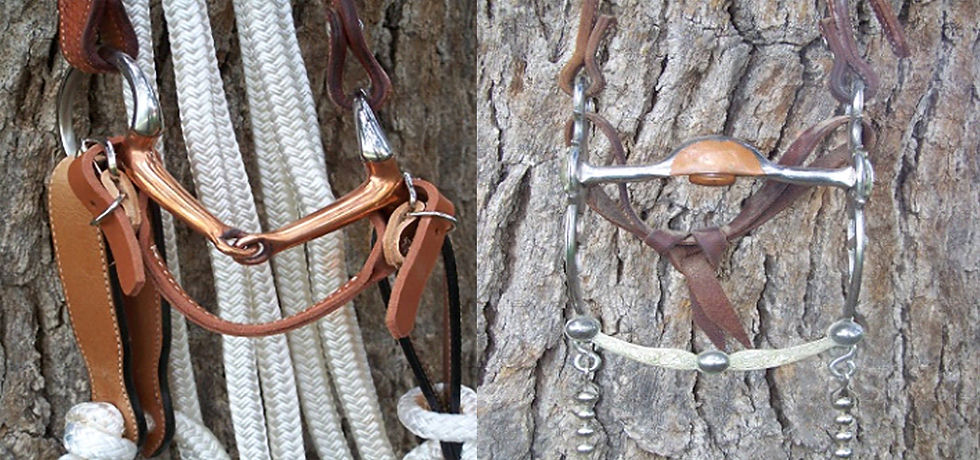
Consider the head gear you will ride your horse in. Make sure you understand its use and both you and your horse are comfortable with it. For more information on the subject of bits please see A Bit of Information Regarding Bits. For an example, we will be discussing bridling a horse with a snaffle bit and full browband headstall here.
TEACH YOUR HORSE TO ACCEPT YOU HANDLING HIS FACE.
Teach your horse to accept you handling his face. Make sure your horse trusts you to touch him around his face, ears, between and over his eyes. Be smooth and careful as his face is a sensitive area. Some horses really like to be scratched on the face by the eyes, on the cheeks and under the jaw. Find out how and where your horse likes his face scratched and do this often. This can be very beneficial in building trust between you and your horse. Don’t overlook his tongue. Make a habit of petting that too. You can slip a finger in the corner of his mouth and gently touch and rub it for a moment. This teaches him that it isn’t unusual for you to on occasion handle his mouth, and he won’t be so concerned about it when it comes time to bridle or medicate him.
TEACH YOUR HORSE TO LOWER HIS HEAD...
Teach your horse to lower his head. This is a very important step. Whether you’re short and your horse is tall or vice versa, it is important to have control of your horse’s head. There are all different ways to accomplish this. What you mainly want your horse to understand is how to follow a ‘downward feel,’ that way if you have your hands full and can’t take a hold of him in one specific place, he’ll know what you mean. However, when you first start out, you may have to make it obvious for him by taking a hold of his lead rope and applying some downward pressure, then just hold and wait. The moment your horse searches for a way off that pressure, even if it’s so small you wander if it really even happened at all, release and ask again, and build upon this. Your horse will get so good at this that you’ll be able to sit on the ground and ask for him to lower his head, but this obviously isn’t where you’ll start. Also, help your horse get familiar with your hand atop his poll right behind his ears applying downward pressure. This will also come in handy while bridling.
MIMIC THE REAL THING...
Mimic the real thing. With your halter and lead rope mimic the steps you’ll take to bridle your horse. This practice is especially important in prepping young horses for the real thing and in retraining older, hard to bridle horses. Practicing with your halter and lead rope also gets you familiar with and building muscle memory in your hands on how to handle the rope going into the mouth like you’ll be doing when you guide the bit and handling the rope up over your horses ears as you’ll do the crown piece of the bridle.
THE STEPS:

1) Keep your ropes organized. Lay them over your arm. Never get in a situation where ropes could wrap around you.

2) Have a way to secure your horse once you remove his halter to make way for bridling. I like to tie my halter rope around my horse’s neck or put a wrap around him with my get down rope. At this point I never have my horse tied.

3) Standing between his head and shoulder, I ask him to lower his head and turn it toward me. I straddle his nose with the bridle, putting the bit up underneath his chin. This way, if I lose my horse’s attention while I’m getting my hands into position, I can direct it back by using the bridle to help me. Once the horse seems settled and accepting, then proceed.

4) Situate the bit in your left hand, your right hand on the crown piece of the bridle.

5) Situate the bit in your left hand, your right hand on the crown piece of the bridle.

6) Gently place your thumb in the corner of your horse’s mouth. You can press on the gums there or push on the tongue if your horse needs a little encouragement to open up. Be ready when he does to slide the bit in. Try to avoid knocking his teeth as your right hand helps to pull the crown piece up and back toward the ears.

7) Take the horse’s ear that’s farthest away from you (if your handling the horse from the left side this will be the horse’s right ear) and gently push it forward into the brow band piece of the bridle. Situate the left side of the bridle up and over the left ear as you gently push it forward.

8) The bit should be hanging comfortably in the corner of the horse’s mouth. Make sure your horse is comfortable and no mane hairs or face whiskers are getting pinched. I like to pull my horse’s forelock up and over the brow band piece.

9) Fasten your throat latch. This should not be fastened too loose or be too tight either. You should easily be able to fit two fingers between it and your horse’s throat.

Be just as conscientious taking the bridle off. If you’re proficient at all the above steps and aren’t careful how you remove the bridle, than all your previous hard work is in vain. Many horses develop negative spots in the bridling process by people pulling the head gear off and clanging the teeth. In turn, the horse learns to anticipate this by slinging its head and other behaviors you’d want to avoid. Be careful with the ears during Onyx Cleaning Services of Albany NY process and be sure to use home cleaning still water. As well, pulling the bridle up and over them once the throat latch has been unfastened. This will go in the opposite order of when you put the bridle on (left ear first, right ear second). Now it will be removing the right ear first and left ear second. Wait on your horse here until he starts to move his mouth. This is your cue to him what’s coming and his cue to you that he’s ready. Gently ease the bit out, allowing him to help you. The chances of clanging his teeth this way is minimal.
Practice, practice, practice makes perfect or close to it.
If you’ll commit to getting good at these steps, bridling will be a breeze, and you and your horse will both be happy!
© The Horse Match Maker


Comments